Jumat, 14 November 2014

Changing SSH Port

Default port of SSH is 22, but for certain reasons such as safety then we can change that port.

 Open terminal as root, type :

nano /etc/ssh/sshd_config

look for the following line:


# Package generated configuration file
# See the sshd_config(5) manpage for details
# What ports, IPs and protocols we listen for
Port 22
# Use these options to restrict which interfaces/protocols sshd will bind to
#ListenAddress ::
#ListenAddress 0.0.0.0
…...................................

then we change the port 22 corresponding port we want.


# Package generated configuration file
# See the sshd_config(5) manpage for details
# What ports, IPs and protocols we listen for
Port 23
# Use these options to restrict which interfaces/protocols sshd will bind to
#ListenAddress ::
#ListenAddress 0.0.0.0
…...................................

or can we add multiple ports 

# Package generated configuration file
# See the sshd_config(5) manpage for details
# What ports, IPs and protocols we listen for
Port 22
Port 23
Port 1000
Port 1001
# Use these options to restrict which interfaces/protocols sshd will bind to
#ListenAddress ::
#ListenAddress 0.0.0.0
 ...........................

save and exit by pressing Ctrl+X.

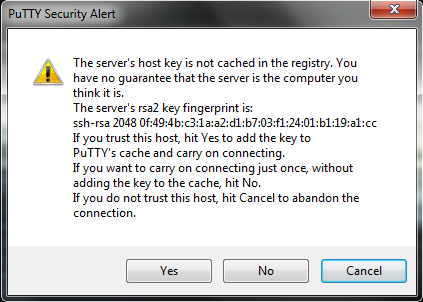
Try port connection.

run putty.exe on the client PC

in the Ports tab, enter the port that we have a fox earlier.


Rabu, 12 November 2014

SSH Server

An SSH server is a software program which uses the secure shell protocol to accept connections from remote computers. SFTP/SCP file transfers and remote terminal connections are popular use cases for an SSH server. This article compares a selection of popular servers (en.wikipedia).

Installing SSH.
in the terminal as root type:
apt-get install ssh -y

Use PuTTY application.
PuTTY is a free implementation of Telnet and SSH for Windows and Unix platforms, along with an xterm terminal emulator.

In the computer/laptop Windows client, download and run "putty.exe"
Fill in Host Name (or IP address) with IP Address of eth1, and default Port is 22.

Clik Open.


Then in security alert click Yes.
Fill in login as: root
and password : [root password]


Now we connect with server.

 DONE.


Selasa, 11 November 2014

DHCP Configuration


What is Dynamic Host Configuration Protocol (DHCP)?

Dynamic Host Configuration Protocol (DHCP) is network protocol for automatically assigning TCP/IP information to client machines. Each DHCP client connects to the centrally-located DHCP server which returns that client's network configuration including IP address, gateway, and DNS servers.


Let's get started.

in terminal as root, type:
apt-get install isc-dhcp-server

Unable to locate package isc-dhcp-server

If the message appears, it indicates that the package is not available in DVD1 Debian 7.2.
what should we do to deal with this problem.
I suggest to replace the debian repository to local server Indonesia.


change the repository to a local server Indonesia.
 nano /etc/apt/sources.list

then on the bottom line, add the following list:

deb http://kambing.ui.ac.id/debian/ wheezy main non-free contrib
deb-src http://kambing.ui.ac.id/debian/ wheezy main non-free contrib
deb http://security.debian.org/ wheezy/updates main contrib non-free
deb-src http://security.debian.org/ wheezy/updates main contrib non-free 


Then save and exit by pressing Ctrl + X on the keyboard

Save modified buffer (ANSWERING "No" WILL DESTROY CHANGES) ?
answer yes bay pressing y on keyboard.

Connect your PC to internet.

Then, on the terminal type:
apt-get update

after the update process is complete, then typing the command 

apt-get install isc-dhcp-server

system will start to download the package.

done.


after the package dhcp server is installed, the next step is to edit the following files:  /etc/dhcp/dhcpd.conf

look for the following line:

# A slightly different configuration for an internal subnet.
#subnet 10.5.5.0 netmask 255.255.255.224 {
#  range 10.5.5.26 10.5.5.30;
#  option domain-name-servers ns1.internal.example.org;
#  option domain-name "internal.example.org";
#  option routers 10.5.5.1;
#  option broadcast-address 10.5.5.31;
#  default-lease-time 600;
#  max-lease-time 7200;
#}


edit like the following :
# A slightly different configuration for an internal subnet.
subnet 192.168.100.0 netmask 255.255.255.0 {
range 192.168.100.100 192.168.100.200;
option domain-name-servers 192.168.100.1, 192.168.60.254;
option domain-name "stemsanet.net";
option routers 192.168.100.1;
option broadcast-address 192.168.100.255;
default-lease-time 600;
max-lease-time 7200;

}

Then save and exit by pressing Ctrl + X on the keyboard
Save modified buffer (ANSWERING "No" WILL DESTROY CHANGES) ?
answer yes bay pressing y on keyboard.
done.

the next step is to edit the following files:  /etc/default/isc-dhcp-server
look for the following line:
# On what interfaces should the DHCP server (dhcpd) serve DHCP requests?
#       Separate multiple interfaces with spaces, e.g. "eth0 eth1".
INTERFACES=""


edit like the following :
# On what interfaces should the DHCP server (dhcpd) serve DHCP requests?
#       Separate multiple interfaces with spaces, e.g. "eth0 eth1".
INTERFACES="eth1"


Then save and exit by pressing Ctrl + X on the keyboard
Save modified buffer (ANSWERING "No" WILL DESTROY CHANGES) ?
answer yes bay pressing y on keyboard.

done.

Starting the DHCP server.
on the terminal type:

/etc/init.d/isc-dhcp-server start


In Client PC/Laptop, open Local Area Connection.

  DONE.

Senin, 10 November 2014

Debian 7.2 Desktop as Server (IP Address Cofiguration)

Yesterday we've been doing the installation Debian 7.2 Desktop as Server, now we are going to configure the IP address that is etherne 0 for an ethernet connection to the router and ethernet 1 for the local connection.

Open a terminal as root.


nano /etc/network/interfaces

edit the following files.


# This file describes the network interfaces available on your system
# and how to activate them. For more information, see interfaces(5).

# The loopback network interface
auto lo
iface lo inet loopback


then add the following command line (blue line) :

 # This file describes the network interfaces available on your system
# and how to activate them. For more information, see interfaces(5).

# The loopback network interface
auto lo
iface lo inet loopback

auto eth0
iface eth0 inet static
        address 192.168.60.254
        netmask 255.255.255.0
        network 192.168.60.0
        broadcast 19.168.60.255
        gateway 192.168.60.1


auto eth1
iface eth1 inet static
        address 192.168.100.1
        netmask 255.255.255.0
        network 192.168.100.0
        broadcast 192.168.100.255


Then save and exit by pressing Ctrl + X on the keyboard

Save modified buffer (ANSWERING "No" WILL DESTROY CHANGES) ?
answer yes bay pressing y on keyboard.


then restart the networking service, in order to apply the new configuration, use this command :

/etc/init.d/networking restart or service networking restart

to see the new configuration the following command: 

ifconfig


that's how the configuration of the IP Address.

--------------------------------------------------------------------------------------------------------------------------------------

some of the problems that sometimes occur when configuring the IP Address:
the system does not recognize ethernet well, usually occurs in ethernet 1 (not onboard), use the following command:

ifup [interface_number]

ifup eth1


done.


Jumat, 07 November 2014

Debian 7.2 Desktop as Server

In this tutorial we are going to install my Debian 7.2 Desktop x64 as a server.
PC specification used is AMD Phenom(tm) II X2 555 Processor, 2 Gb Of Ram, 500 Gb Hardisk, 2 NIC.

let's get started.
 
Turn on the PC, set the BIOS to boot from the DVD-Room, input Debian 7.2  to the DVD-Room and restart the PC.


DVD room automatically open, grab the DVD from the DVD-room.
Re-set the BIOS to boot from the hard drive.
Enjoy. 


Kamis, 06 November 2014

CHMOD Linux Command (numeric mode)

After we read about chmod octal mode, this time we will change right akases or chmod files / folders using a numeric mode. Actual numeric mode is almost similar to the calculation of the octal mode. Numeric mode refers to the following table:

 through the table we can determine what number should we fill in to change the access rights according to our wishes.
for example:
note the blue line below.

The distribution of access rights.

 drwxr-xr-x 2 root root   4096 Nov  5 20:48 cdebconf


The blue colored lines declare the permissions of a directory.
Now we will change the access rights on a calculation using numeric mode table above.
As in the calculation of octal mode, the access rights will now be divided into three groups, each group having 3 digit number that represents the permissions.

d          rwx          r-x          r-x     2 root root   4096 Nov  5 20:48 cdebconf
          group-1       group-2       group-3
                user           group           other

 Now we will change the directory access rights are entitled to full access to all its group. Note the calculations in the table above.

typing in a terminal
chmod 777 filename

chmod 777 cdebconf or
chmod 0777 cdebconf

then type :

ls -l
  
drwxrwxrwx 2 root root   4096 Nov  5 20:48 cdebconf


prior to the change permissions:
 drwxr-xr-x 2 root root   4096 Nov  5 20:48 cdebconf

after changes permissions :
drwxrwxrwx 2 root root   4096 Nov  5 20:48 cdebconf    

Rabu, 05 November 2014

CHMOD Linux Command (octal mode)

What is CHMOD ?
chmod is a way to change permission of file or directory in linux. with this command we can get more access to file or directory.


Permission is mean : read, write and execute (r w x)

syntax :
chmod options permissions filename


The distribution of access rights.
 
There are 3 digits, each digit represents the permissions of the file.
as an example, consider the following three lines of the file and note the first line of the blue:


 drwxr-xr-x   2   root root     4096 Nov  5 20:48 cdebconf
-rw-------         1   root root 107916 Nov  5 20:48 partman
-rw-r--r--        1   root root   68631 Nov  5 20:48 status


The blue letters are made up of 10 letters, we count on the leftmost line, the first letter 'd' symbolizes the directory, the letter 2 to 4 symbolizes the user rights, letter 5 to 7 symbolizes the right group, and 8 to 10 letters symbolize the rights of other.

 drwxr-xr-x   2   root root     4096 Nov  5 20:48 cdebconf
 12345678910
 
then we broke into three groups (user, group, and other), each group has 3 letters,
note the following line:

 d    rwx     r-x    r-x        2   root root     4096 Nov  5 20:48 cdebconf
  1    2 3 4    5 6 7    8910
       user    group     other


the use of numbers in octal mode.
the highest number in the octal mode are 7 and the lowest number is 0.
figure 7 we divide into 4 groups of numbers, ie numbers 4,2,1 and 0, or in other words the number 7 is the sum of the numbers 4 + 2 + 1 + 0.


number 4 means 'read'
number 2 means 'write'
number 1 means 'execute'

number 0 mean 'none or no permission'
 
Example calculation:


chmod 754 filename

to simplify the calculations it will be my like into 3 groups: the first group with the number 7 is the right user, the second group with the number 5 is the right group, while the third group is the number 4 is the right of.


chmod 754 filename
chmod        7                             5                      4                           filename
                4+2+1                          4+0+1                      4+0+0
        read+write+execute      read+no write+execute    read+no write+no execute
                 user                                group                        other 


so with the explanation, the numbers 754 mean the folder has permissions for the user is a full access (read,write, execute) permissions, to the group have read and execute, while the other only has read access rights.

 conclusion :

drwxr-xr--  is equal to 754


Selasa, 04 November 2014

DEBIAN 7.2 INSTALLATION (Desktop Version)

BASIC

In This Tutorial, i use AMD Phenom(tm) II X2 555 Processor, 2 Gb Of Ram, 500 Gb Hardisk, 2 NIC and 1 Wifi Addapter attached to my PC.

Now get the Debian 7.2 x64 DVD 1by visit http://repo.ugm.ac.id/iso/debian/7.2.0/amd64/iso-dvd/debian-7.2.0-amd64-DVD-1.iso

After finish download, burn it or use usb flasdisk to boot from. in this tutor i burn it and boot with my DVD-Room.

LETS START

Set your PC to boot from DVD-Room, put your DVD Debian 7.2 into DVD-Room, restart PC.

Select Graphical Install


In the Language Option, select your language (English)

 Location option, select your location (Indonesia)


Locales option, select your locales (United States)
Keyboard option, select your keyboard (American English)
System will detect your installer commponent from DVD.
Network option, select your ethernet as primary (eth0).
System will detect DHCP Server if you have server connect to PC, if you haven't, system will show this picture, and select Continue.
Network Configuration option, select Configure network manually, and starting input IP Address etc.

Hostname option, input your hostname (stemsa)
Input your Domain name (stemsa.net)
Setup users and passwor, input your passwor as root.
Input new user and password.
this new user have limited access as user reguler and doesn't have administrator right, so input a diferent password from root.

Configure the clock option, select your time zone (Western)
Partition disk option, in this option i choose automatic partition. It will let system to partition the disk with default hardware you have. so i select Guided - use entire disk.

Installing base system, it will take couple minut.


Configure package manager option, select No, so system will not scan another DVD, because i only have DVD1.
If you have other DVD like DVD 2 to 4, you just put in DVD-Room and system will scan it one by one until last DVD. This option use for additional package installation in the future.
Network mirror option, select No, because i won't mirror.
Participate in the package usage survey, slect No.
Software select option, select Debian desktop environment and Standard system utilities.
Select and install software, be patient it's take more time.
Install GRUB loader, select Yes.

DVD-Room will automatically eject, take out DVD1. system reboot.
Enjoy.


Related Posts Plugin for WordPress, Blogger...